My shopping cart
Your cart is currently empty.
Continue ShoppingReplacing a door handle may seem like a daunting task, but with the right tools and knowledge, it can be easily done in just a few simple steps. Whether your door handle is broken, damaged or simply needs an upgrade, this guide will provide you with all the necessary information to successfully replace it.
With detailed step-by-step instructions and tips, you will be able to complete this DIY project without any hassle or frustration. So why spend money on hiring a professional when you can save time and money by doing it yourself? Follow these easy steps and say goodbye to that old door handle in no time.

Before starting the replacement process, it's important to gather all the necessary materials. Some of these may vary depending on the type of door handle you have, so be sure to check beforehand. Here are the basic materials you will need:
New door handle (with screws and latch)
Screwdriver
Drill (if needed)
Measuring tape
Pencil
Hammer
Chisel (if necessary)
Safety goggles and gloves (optional)
It's always a good idea to have all these materials on hand before starting the replacement process, as it will save you time and frustration. Additionally, make sure to choose a door handle that matches the style and size of your current one to ensure a proper fit.
If you are replacing an exterior door handle, it may also be wise to invest in a more durable option with a lock for added security. Once you have all the necessary materials, you can move on to the step-by-step guide for replacing your door handle.

There are a few variations in the steps depending on the type of door handle you have, so be sure to refer to the manufacturer's instructions if needed. Here is a general guide for replacing a standard doorknob:
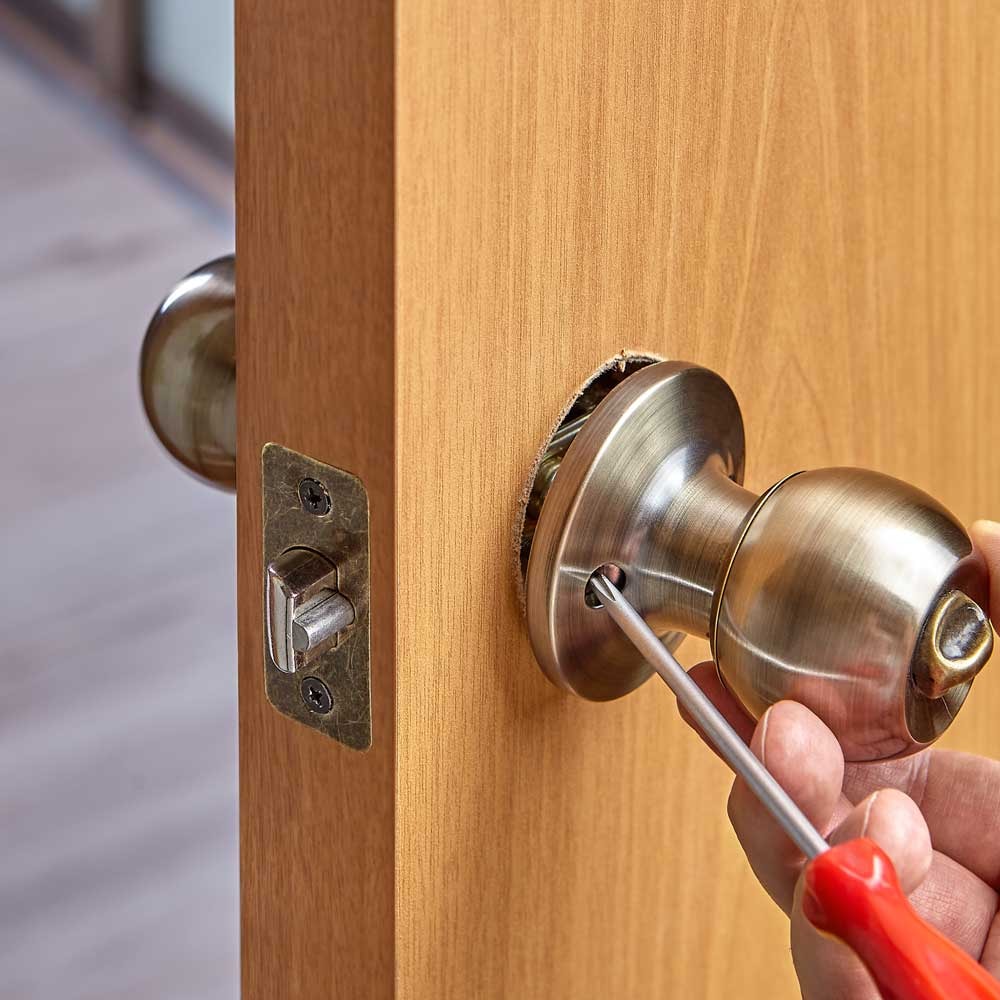
To begin removing the old door handle, start by inspecting it for any visible screws, typically located on the inner side of the door.
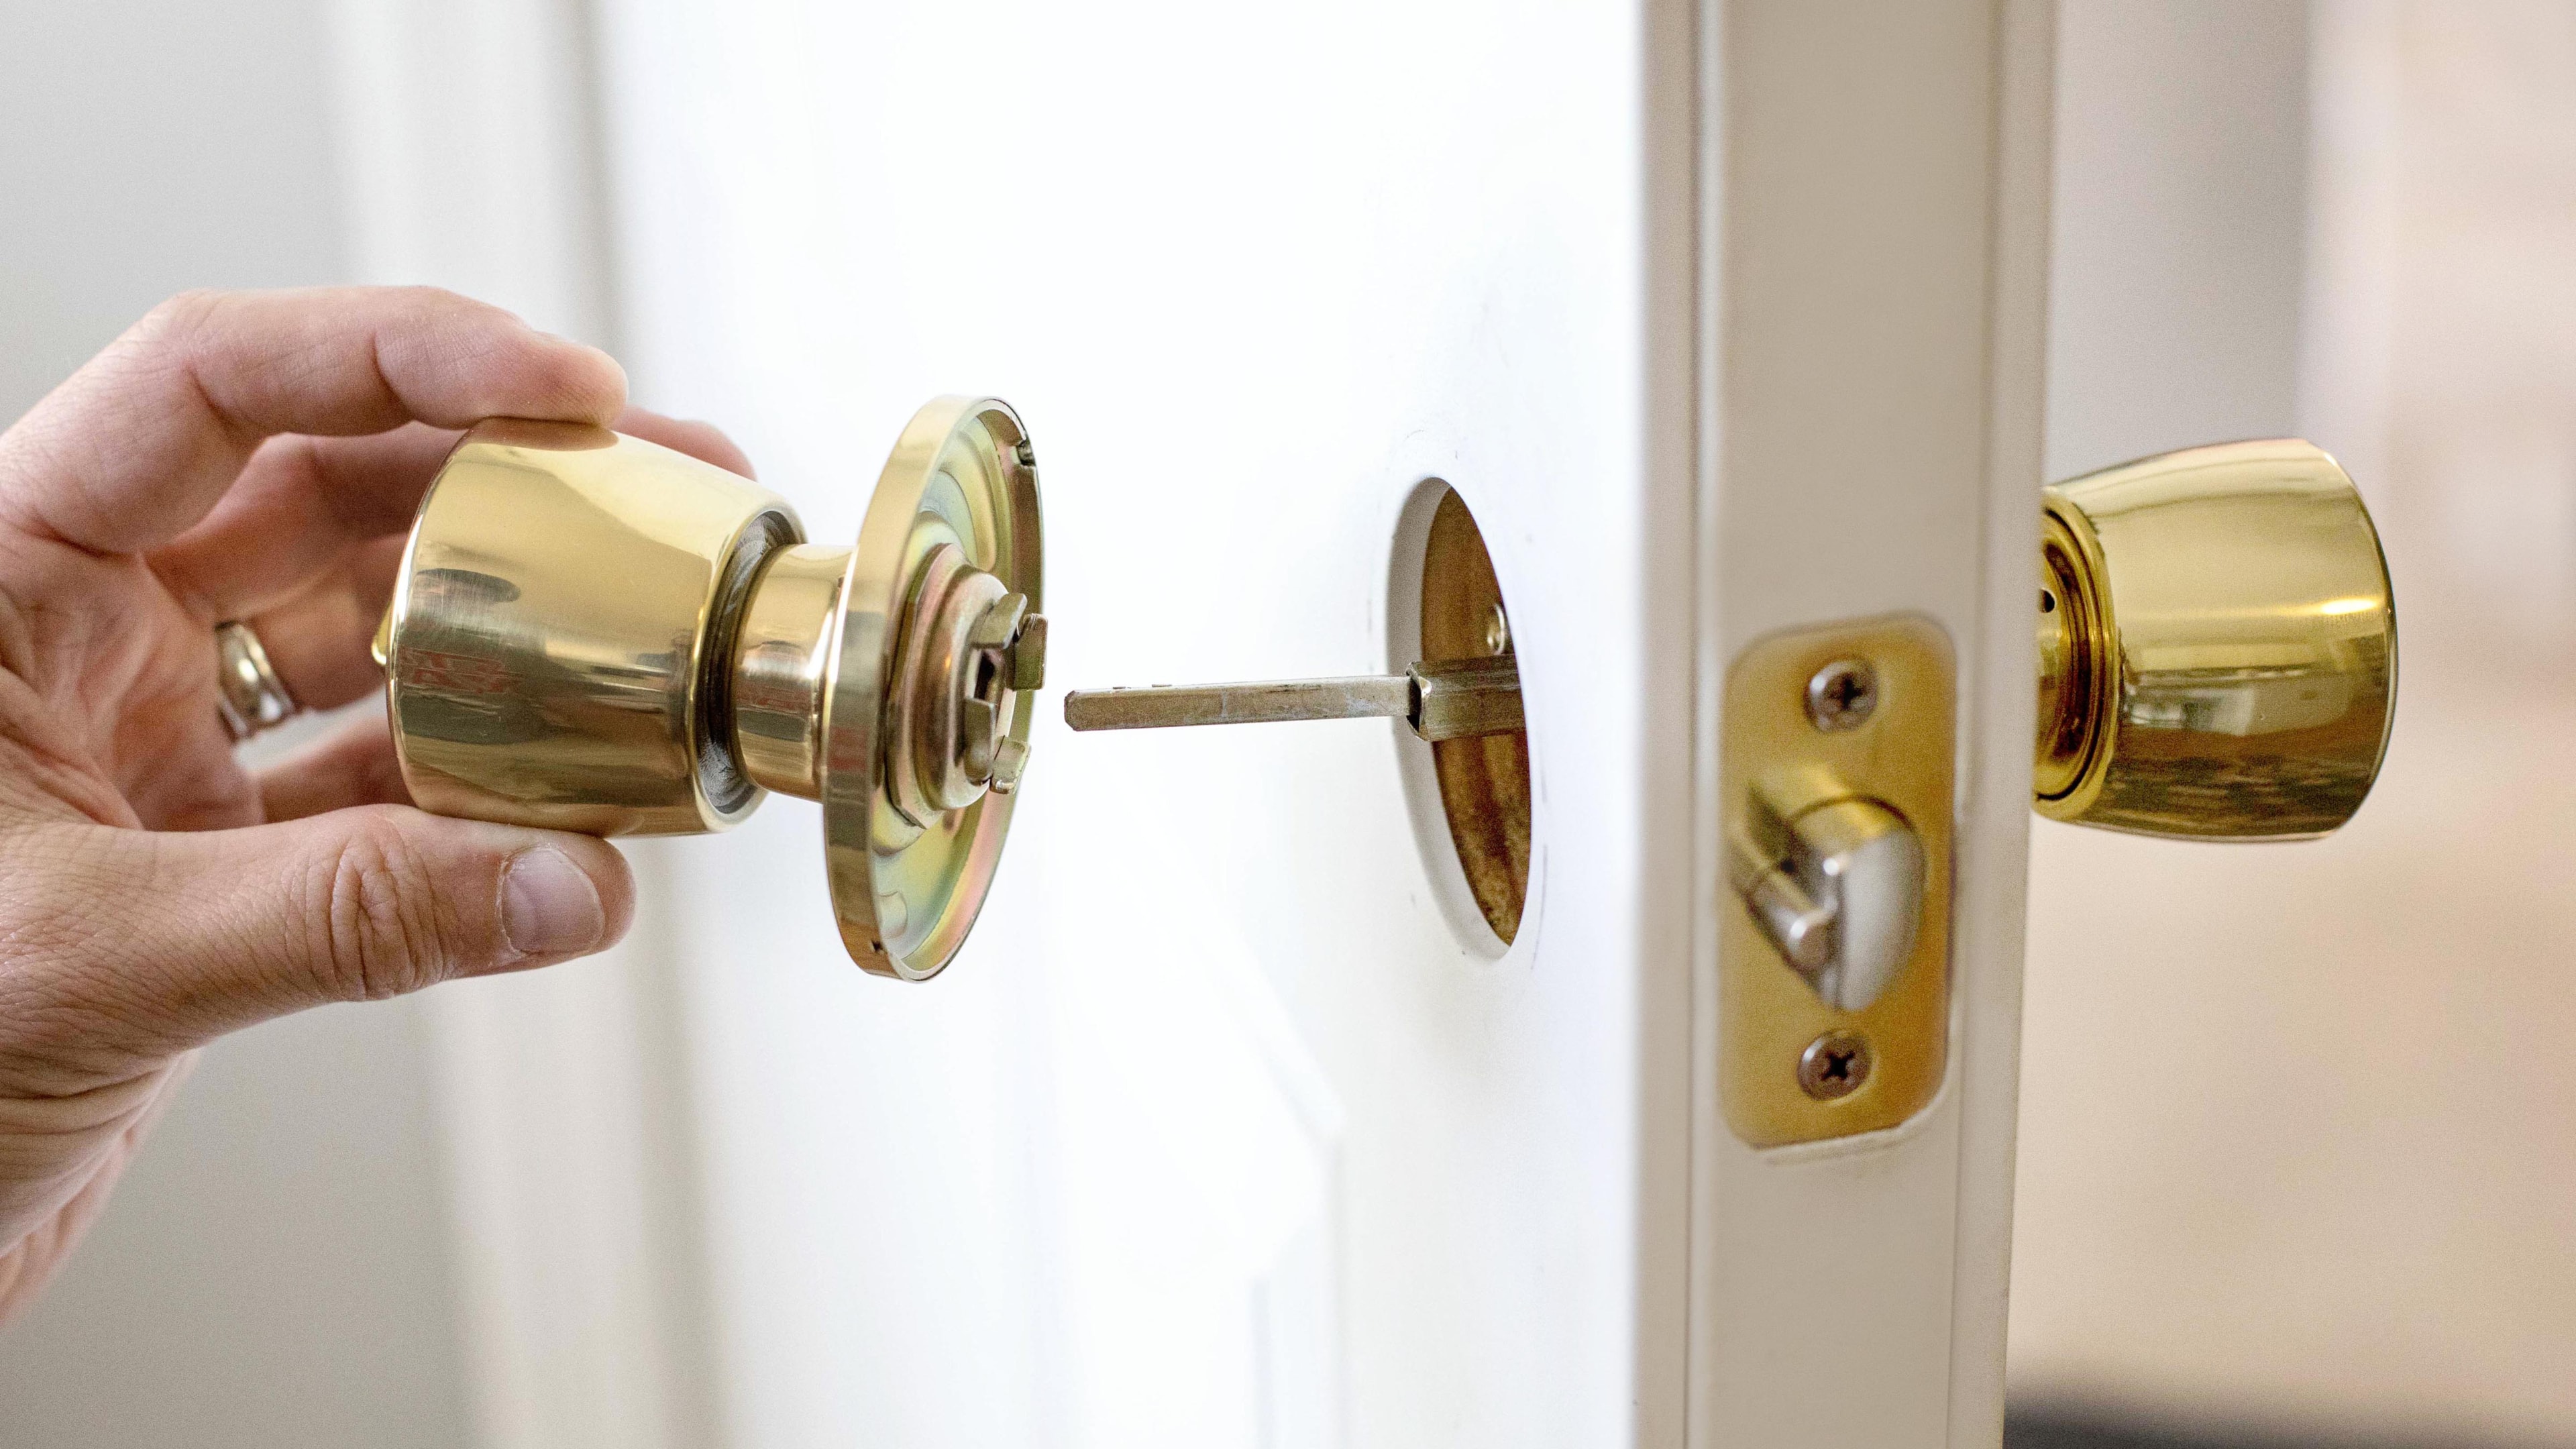
Using a screwdriver, carefully unscrew these fasteners to detach the handle from the door. If your door handle has a visible cover plate, gently prying it off may provide access to more screws. After removing the screws, pull the handle away from the door. If it is stuck, a gentle twist and pull may help.
Once detached, also take out the latch mechanism by unscrewing it from the edge of the door. Ensure that all components are removed completely to prepare for the installation of the new door handle.
Once the old door handle and latch have been removed, the next step is to measure and mark the position for the new door handle. Begin by using a measuring tape to determine the height at which you want to install the new handle.
Generally, door handles are set between 34 to 48 inches from the floor. Once you've chosen the appropriate height, use a pencil to mark this spot on the door.
Additionally, place a mark where the latch bolt will be positioned, aligning it with the thickness of the door. Taking precise measurements and marking clearly will ensure that your new door handle is installed correctly and functions smoothly.
Depending on the type of door handle you are installing, you may need to pre-drill holes for screws or other components. For example, if your new door handle has a different design or size than the previous one, pre-drilling may be necessary to ensure a secure fit.
Using a drill and appropriate sized bit, carefully make pilot holes at the marked positions on the door. Take care not to drill too deeply or send fragments into the door. Once drilled, remove any debris from the hole and proceed with attaching the latch.
Plus, it's always a good idea to have an extra set of hands to hold the door in place while drilling to ensure accuracy. Remember to wear safety goggles and gloves for protection.
Next, take the latch mechanism and align it with the pre-drilled holes on the edge of the door. Using a screwdriver, carefully fasten the screws to secure the latch in place. Double check that it is properly aligned and positioned, as this will affect the functionality of your new door handle.
If your new door handle came with its own set of screws, be sure to use those instead of reusing old ones. Additionally, if necessary, you can use a hammer and chisel to create notches for a more snug fit.
After attaching the latch, it's time to install the exterior and interior parts of the door handle. Begin by attaching the exterior part of the handle, making sure that it lines up with the latch mechanism. Once in place, secure with screws.
Next, take the interior part of the handle and line it up with the spindle from the outside handle. As you attach it, make sure that it is properly aligned and functioning smoothly. Secure with screws, if needed.
Plus, if your new door handle has a lock, remember to install the key cylinder as well. Test the door handle to make sure everything is working properly before moving on to any final adjustments.
Once all components are securely attached, test your new door handle to ensure proper function. If there are any issues or difficulties in operation, double check all steps and make necessary adjustments.
If everything is working well, you can now add any decorative covers or plates that came with your new door handle to give it a finished look.
With these simple steps, you can successfully replace your old door handle and have a functioning, stylish addition to your home's doors. Remember to always refer to the manufacturer's instructions for specific details and variations in installation.

Replacing a door handle does not typically require any special tools. However, having the right tools can make the process easier and more efficient. Some common tools that may be needed for replacing a door handle include:
Screwdriver (Phillips or flathead)
Drill
Measuring tape
Pencil
Safety goggles
Gloves
Depending on your specific door handle, you may also need additional tools such as a chisel or hammer for creating notches. It is always best to refer to the manufacturer's instructions for any necessary tools and their recommended sizes.
Having these tools readily available can save time and frustration during the installation process. They also ensure that the door handle is properly attached and functioning correctly. It may also be helpful to have an extra set of hands for holding the door in place while attaching components.
At My City Doors, we understand the importance of choosing the right interior doors for your home. That's why we offer a wide selection of high-quality interior doors in various styles and designs to suit any space.
Our showroom boasts an extensive collection of shaker style doors, barn doors, and traditional wooden and metal doors that will add both functionality and aesthetic appeal to your home. We also have options for small spaces, open concept homes, and even historic properties.
But our commitment to quality doesn't stop at design. We also prioritize providing durable and long-lasting door hardware to accompany our beautiful doors. From door knobs to hinges, every piece is carefully selected to ensure optimal style and functionality.
So choose My City Doors for all your interior door needs and transform your home into a cohesive and visually appealing space.
To replace a door knob and latch mechanism, you’ll need a flat head screwdriver, a new door knob, and a new latch. These basic tools will help you remove the old door latches and install the new hardware into the door hole and door jamb.
To remove the old door knob and door latch mechanism, start by unscrewing the screws on the door knob with a flat head screwdriver. Once the knob is removed, pull out the door latch mechanism from the door hole. Finally, remove the latch plate from the edge of the door and the strike plate from the door jamb.
To install a new door knob and latch in a door frame, first insert the new latch into the door hole, ensuring that it aligns with the latch plate on the door frame. Then, attach the new door knob by aligning it with the door latching mechanism and securing it with screws in the screw holes. Finally, check that the door latches properly and that the strike plate aligns with the door stop.
When replacing a door knob, ensure the latch plate is securely attached to the edge of the door, and that it aligns with the strike plate on the door jamb. If needed, adjust the position of the strike plate to match the new latch, ensuring that the latching mechanism functions smoothly when the door is closed.
Installing a new door handle may seem like a daunting task, but with the right tools and steps, it can be easily accomplished.
By following these simple guidelines and referring to the manufacturer's instructions, you can successfully replace your old door handle and improve the functionality and aesthetics of your home's doors.
Don't forget to explore the wide selection of interior doors at My City Doors for a variety of high-quality options. So why wait? Get started on your door handle replacement project today and enjoy the benefits of a secure, stylish, and functional door. Happy renovating!