My shopping cart
Your cart is currently empty.
Continue Shopping
A traditional door announces itself with casing. The trim frames the opening, covers the drywall edge, and creates a clear visual boundary between the wall and the door.
Trimless door trim takes the opposite approach.
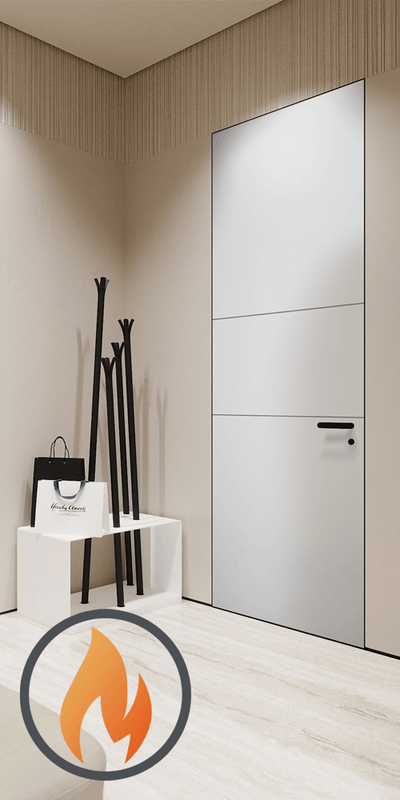
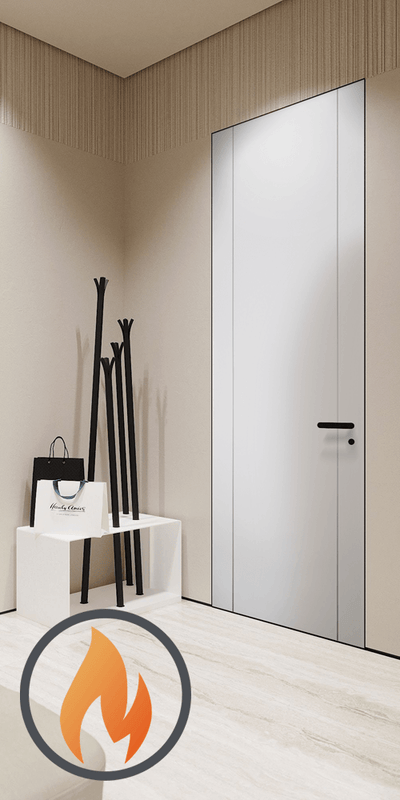
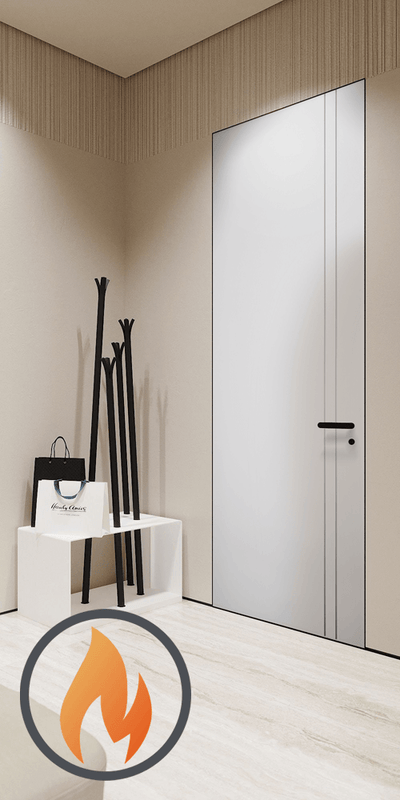
Instead of adding a visible wood or composite casing, a concealed frame is coordinated with the drywall so the door sits almost flush with the surrounding wall. The result is a quieter architectural detail: the door leaf can appear to disappear into the wall, while a narrow shadow line defines the opening.
This look is highly effective in modern interiors because it reduces visual clutter and allows the wall plane, material palette, and natural light to remain the focus. However, a successful installation depends on more than selecting a minimalist door. The framing, drywall, floor, baseboard, paint, and hardware must all be planned together.
Below, you will see how concealed casings work, what installation coordination involves, how drywall transitions are finished, what trimless doors may cost, and where this detail makes the most design sense.
Trimless door trim is a door-opening detail in which the casing is concealed rather than exposed. The door frame is installed so its visible edge aligns closely with the finished wall, eliminating the traditional molding around the jamb and head.
You may also hear related terms such as:
These terms can overlap, but they do not always describe exactly the same construction. Some systems use a specialized metal frame. Others rely on a concealed casing or architectural drywall bead that creates a consistent reveal.
The key distinction is simple: standard casing hides the transition, while trimless detailing makes the transition precise enough to display.

A trimless door is usually selected for visual and spatial reasons. It is not merely a door without molding.
Visible casing interrupts a wall with another profile, color, and material. A concealed casing allows the wall to read as one uninterrupted surface.
This is especially useful in hallways, galleries, living rooms, and open-plan interiors where several doors may otherwise create a busy rhythm of frames and trim.
A tall, flush door can appear less like a separate object and more like part of the wall design. This effect is particularly strong when the door and wall share a similar paint color or finish.
The detail becomes quiet, but not invisible.
Trimless systems work well with floor-to-ceiling or near-ceiling-height doors because there is no heavy casing competing with the vertical lines. A tall door can make a room feel more spacious and deliberate.
For projects that require coordinated sizing and frame options, review the custom-order interior doors and frames collection.
In a minimalist interior, every line matters. Removing traditional casing can help cabinetry, artwork, windows, flooring, and architectural lighting read more clearly.
This is one reason concealed-casing doors are often paired with restrained hardware, planar surfaces, and neutral finishes.
A trimless installation usually combines four visible and concealed elements:
The narrow reveal between the frame and drywall is important. It is not an accidental gap. It is a controlled shadow line that protects the edge detail and gives the opening visual definition.
A reveal that changes width from one side to the other will be immediately noticeable. With no casing to disguise the opening, even small framing or drywall errors become part of the finished design.
The most common mistake is treating a trimless door as a finish decision made after the walls are framed. It should be coordinated before installation begins.
Your designer, contractor, door supplier, and drywall installer should confirm:
If the wall build-up changes during construction, the frame may no longer sit correctly in relation to the finished drywall.
The concealed frame must be square, plumb, and firmly secured before the drywall transition is completed. This is the stage where the installer confirms hinge positions, door clearances, and the relationship between the jamb and wall surface.
A conventional casing can hide a modest amount of irregularity. Trimless door trim cannot.
The drywall should not simply be cut close to the jamb and filled with compound. The opening requires a consistent setback based on the selected transition system and reveal size.
Architectural shadow beads or similar drywall profiles can bridge the drywall edge to the frame. The precise dimensions vary by system, so the installer should follow the door and bead manufacturer’s requirements rather than relying on a general measurement.
Once the drywall is positioned, the transition profile is secured and covered with joint compound. The compound is feathered outward into the wall so the surface becomes smooth while the shadow line remains open and crisp.
This process usually requires multiple coats, drying time, sanding, priming, and careful inspection under natural and artificial light.
The door leaf should be installed after the surrounding finish has reached the appropriate stage. This helps protect the door from compound, sanding dust, paint, and construction traffic.
Hardware should also be selected early. A slim lever, concealed hinge, or matte finish may support the architectural appearance, but the hardware still needs to provide comfortable operation and reliable alignment. Explore modern European interior doors for design directions that pair well with clean wall transitions.

The transition between the frame and drywall is where the quality of the installation becomes visible.
The drywall must remain flat as it approaches the opening. Bulges, torn paper, uneven cuts, or excessive compound can distort the reveal and create shadows that look accidental.
A smooth wall finish generally produces the cleanest trimless result. Heavy texture can soften the line or partially fill the reveal. If you are using plaster, limewash, Venetian plaster, or another specialty finish, confirm that the applicator understands how to protect the frame and preserve the opening.
Painting the door and wall in the same color creates the most integrated appearance. A contrasting door can also work, but the crisp edge will become more visually prominent.
Remember that sheen matters. A matte wall paired with a high-gloss door will emphasize the door leaf. Similar sheen levels create a quieter, more continuous effect.
The baseboard-to-door relationship must be resolved before installation. Common approaches include:
The right choice depends on the rest of the room. A trimless door with bulky traditional baseboards can look visually unresolved.
Flooring should be complete, or its finished thickness should be known, before final door adjustments. Hardwood, stone, tile, and carpet all affect the bottom clearance.
The door must operate without dragging while maintaining a controlled gap that supports privacy and ventilation requirements.
A trimless door is not automatically less expensive because it uses less visible molding. The cost of casing may be reduced, but the project usually requires more precise labor.
For planning purposes, standard interior door casing installation is often estimated at approximately $150 to $250 per opening for casing-related labor and materials in many U.S. markets. Trimless detailing can meet or exceed that amount because the labor shifts to framing accuracy, drywall preparation, specialty transition profiles, finishing, and quality control.
Your total cost may include:
Request a line-item estimate. Ask whether the price includes the frame, door, hardware, drywall transition, painting, and final adjustment. This prevents a common misunderstanding in which the door is priced separately from the architectural finish required to make it look trimless.
Maintenance is straightforward, but the wall edge requires more care than a traditional wood casing.
Use a soft cloth and a mild, non-abrasive cleaner appropriate for the door finish. Avoid saturating the edges or allowing water to collect near the frame.
The narrow shadow line should remain free of paint buildup, dust, and compound. Do not use abrasive tools or aggressive scrubbing near the drywall edge.
Seasonal movement, building settlement, vibration, or repeated impact can create small cracks near the frame. These are usually repairable, but the area may need to be filled, sanded, primed, and repainted.
If the door begins rubbing, drifting, or failing to latch, address it early. Hinge adjustments and strike alignment are easier before the frame or wall finish is damaged.
Save the wall paint, door finish information, and hardware specifications. A small repair is much easier when the correct materials are available.
Trimless door trim is especially effective where you want a calm, continuous surface.
A series of flush doors can make a corridor feel more like a gallery than a service zone. Matching wall and door colors creates a disciplined rhythm.
A concealed door can provide a quiet transition between a bedroom and dressing room while keeping the wall composition simple. Natural wood finishes add warmth without introducing decorative casing.

A flush door helps an office blend into the living space when closed, while still providing privacy when needed. Coordinated doors can also conceal storage, utility areas, or secondary rooms.
Trimless detailing can be paired with a pocket door when space efficiency is important. The frame and wall assembly require careful coordination because the pocket cavity, drywall, hardware, and finished opening must all work together.
For space-saving solutions, compare the pocket door collection.
In an older home, a trimless door can provide a modern counterpoint to existing architectural details. Use it selectively so the new detail feels intentional rather than disconnected from the original structure.

Choose trimless door trim when:
Choose conventional casing when:
The best result comes from treating the door as part of the architecture, not as a separate fixture installed at the end of construction. When the frame, wall, reveal, hardware, and finish are coordinated, a trimless door can create a refined sense of continuity that makes the entire interior feel more spacious and considered.
A: Trimless door trim describes the concealed casing and wall transition around the opening. A flush door usually describes the appearance of the door leaf itself. A project can use one term, the other, or both.
A: Yes, but remodeling usually requires more preparation. The wall may need to be opened, reframed, leveled, and refinished so the concealed frame aligns with the finished drywall plane.
A: It often is, because the savings on visible casing can be offset by specialty frames, drywall transition profiles, precise installation, additional finishing, and coordination between trades.
A: Most trimless systems use a narrow reveal or shadow gap to create a clean separation between the door frame and drywall. The exact width depends on the selected system and desired appearance.
A: Yes. Matching the door and wall color is one of the most effective ways to create an integrated architectural look. Similar sheen levels will make the transition feel even more continuous.
A: Begin with a properly secured frame, a consistent drywall transition, compatible finishing materials, and careful installation. Building movement can still cause minor cracks, so keep matching paint available for future touch-ups.
Trade Program
Are You a Trade Professional?
Architects, designers, and contractors receive exclusive pricing and dedicated project support.
Learn About Trade Pricing →Get Started
Our team can help with product selection, sizing, and specification — at no charge.


