My shopping cart
Your cart is currently empty.
Continue Shopping
Painting an interior door is one of the most effective ways to refresh a room without replacing the entire doorway.
A well-painted door can make a hallway feel cleaner, give a dated room a more considered appearance, and help your interior doors coordinate with walls, trim, cabinetry, or architectural details.
The result depends less on the color you choose than on the preparation and application. Dirt, glossy old paint, poorly sanded repairs, heavy coats, and premature rehanging can all leave you with brush marks, visible ridges, sticking edges, or an uneven sheen.
This guide explains how to paint interior doors from start to finish. You will learn how to remove and prepare the door, sand and prime it, choose the right sheen for a high-traffic area, decide between spraying, rolling, and brushing, and rehang the door without damaging the finish.
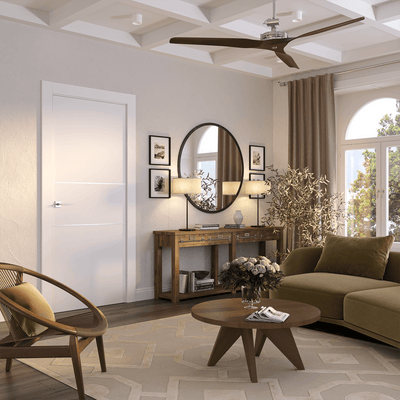
If you are planning a broader renovation, consider how the finished door will work with the rest of your interior. Modern European-style swing doors, pocket doors, and other architectural door styles can create a more cohesive result when their finish, hardware, and proportions are selected as part of the overall design.
A flawless painted door starts with a stable surface. Paint cannot hide grease, loose coatings, deep dents, or dust. It simply highlights them.
Before you begin, confirm that the door is suitable for painting. Solid wood, previously painted wood, and many primed wood-based doors can usually be prepared and recoated. Veneer, laminate, high-gloss factory finishes, and specialty architectural surfaces may require a specific bonding primer or may not be intended for repainting.
Check the manufacturer’s care instructions when available. If the door is damaged, warped, or part of a concealed-frame or sliding system, professional advice may be more appropriate than a standard repaint.
Gather everything before removing the door:

The following process works for most standard interior doors. Read the paint and primer labels first, because drying and recoat times vary by product, temperature, and humidity.
Removing the door usually produces a better finish because you can reach the edges and lay the door flat. Painting while the door is hanging may seem quicker, but it makes it harder to avoid drips and creates a greater risk of painting hinges, latches, or jambs.
If you cannot remove the door, protect the floor and frame with masking materials. Keep the door open while each coat dries, and avoid applying paint to the hinge knuckles or latch hardware.
When removing hardware, take a quick photograph before disassembly. This is particularly useful when the door has multiple hinge positions, specialized latches, or concealed components.
Do not strip a sound existing finish automatically. Full stripping is time-consuming and may damage veneer or detailed profiles. In most cases, the goal is to create a clean, dull, firmly attached surface that the new primer and paint can grip.
Sanding is not intended to remove every layer of old paint. It has three practical purposes:
Use a sanding sponge on profiles and molded details. It conforms to the shape better than a rigid sanding block. Avoid excessive pressure, especially on veneer, engineered surfaces, or sharp corners.
Primer is essential when the substrate is exposed, the old coating is questionable, or you are making a dramatic color change. It is also useful over knots, stains, and repaired areas that might otherwise show through the finish.
A common mistake is spot-priming only the filler. This can create differences in porosity and sheen. If the repaired areas are numerous or the color is changing substantially, prime the whole door.

The sheen affects both the appearance and maintenance of the finished door.
For family rooms, hallways, kitchens, laundry areas, and bathrooms, a quality satin or semi-gloss door-and-trim enamel is usually the most balanced choice. Semi-gloss is more forgiving in high-contact areas, while satin creates a softer, more contemporary effect.
Always test the sheen in the room’s actual lighting. Natural daylight, warm artificial light, and nearby matte surfaces can change how reflective the finish appears.
Each application method can work well when matched to the door and your working conditions.
Spraying can create the smoothest finish on a flat or paneled door. It is especially effective when several doors are being painted at once.
Use an appropriate HVLP sprayer, prepare a clean and ventilated space, and mask everything that should not receive paint. Apply several light passes rather than one heavy coat. Keep the sprayer moving and maintain a consistent distance from the surface.
Spraying is not automatically the professional choice for every project. Setup, masking, overspray control, and equipment cleaning take time. If the work area is not properly contained, rolling may produce a better overall result with less risk.

A fine-finish mini roller is often the best option for a homeowner painting a flat or lightly detailed door. It provides even coverage quickly and can reduce visible brush marks.
Use a high-density foam roller or a short-nap roller designed for smooth surfaces. Apply a thin coat, then lightly roll in one direction to even out the texture. Do not press hard or overload the roller.
A quality angled brush is essential for edges, recessed panels, narrow profiles, hinge mortises, and areas around hardware. Brush in the direction of the door’s grain or architectural lines.
Do not overwork the paint. Once the coating begins to set, additional brushing can pull the surface and create ridges. For a refined result, many designers use a brush for details and a fine-finish roller for the broad flat sections.
Drying time is controlled by the paint formula, coat thickness, airflow, temperature, and humidity. A coating that is dry to the touch is not necessarily ready for another coat or heavy use.
Follow the product label for recoat and cure times. Cold or humid conditions can extend the process significantly. Thin coats dry more evenly and are less likely to remain soft in the center.
Keep the door in a clean, low-dust area while it dries. Do not place tools, cloths, or hardware on the painted surface. If you must turn the door over, wait until the coating is firm enough that padded supports will not imprint it.
The final stage requires patience. Rehanging too soon is one of the most common causes of sticking and damaged edges.
Before reinstalling, confirm that:
Have someone support the door while you align the hinges. Do not force the door into position or drag its bottom edge across the floor. Reinstall the hardware carefully, then open and close the door slowly.
Leave the door open or slightly ajar at first. This prevents freshly painted edges from bonding to the jamb or stop. If the door rubs, do not immediately sand or plane it. Give the finish time to harden, then identify whether the issue is caused by paint buildup, hinge alignment, swelling, or an existing frame problem.

Wall paint is not designed for the repeated contact and cleaning that doors receive. Use an interior enamel made for doors and trim.
Even a small amount of hand oil can interfere with adhesion. Clean before sanding and remove dust before every coat.
New paint may peel or scratch easily if the old finish is still slick. Dull the surface with sandpaper and use bonding primer when necessary.
Heavy coats create drips, slow drying, and increase the chance of sticking. Two or more thin coats are more reliable than one thick coat.
The edges are visible when the door opens and closes. They also determine whether the door will fit comfortably in the frame after painting.
Repeated brushing or rolling over semi-dry paint creates texture. Work in manageable sections and leave the surface alone once it has leveled.
Dry to touch is not the same as cured. Give the final coating enough time to harden before closing the door or reinstalling tight-fitting hardware.
Some factory finishes, laminates, and specialty surfaces require specific preparation. If you are unsure, test the primer and paint in a small inconspicuous area first.
The best painted interior doors look simple because the preparation is invisible. Remove the hardware, clean carefully, sand without damaging the profiles, prime when needed, and apply thin coats of the correct enamel.
For most high-traffic doors, satin or semi-gloss offers the strongest combination of aesthetic appeal, durability, and easy maintenance. Use a brush for detailed areas, a fine-finish roller for flat sections, and a sprayer only when you can control the workspace properly.
Take your time between coats. That is where a good project becomes a refined one.
A: Removing the door usually produces the cleanest result because you can paint the edges and lay the door flat. If removal is not practical, protect the frame and hardware carefully and keep the door open while it dries.
A: Yes. Lightly sand to smooth imperfections and reduce the gloss of the existing finish. You do not usually need to remove all old paint unless it is peeling, unstable, or incompatible with the new coating.
A: Satin and semi-gloss are the most practical choices. Semi-gloss is generally easier to clean and more resistant to repeated contact, while satin provides a softer, less reflective appearance.
A: Spraying can provide the smoothest finish, but it requires careful masking, ventilation, and equipment cleaning. A fine-finish mini roller combined with an angled brush can produce an excellent result with less setup.
A: Two thin finish coats are typical after proper preparation and priming. A third coat may be necessary for a major color change or when the first two coats do not provide even coverage.
A: Follow the paint manufacturer’s cure guidance. As a practical precaution, wait at least overnight before careful reassembly, and longer in cool or humid conditions. Keep the door open or ajar initially.
A: The paint may not have cured, or too much coating may have built up on the edges or jamb. Avoid forcing the door. Allow the finish to harden, then inspect the alignment and remove only the necessary buildup.
A: No. Many wood and previously painted doors can be recoated, but veneers, laminates, specialty finishes, and architectural door systems may require specific products or may not be intended for repainting. Check the manufacturer’s guidance first.
Trade Program
Are You a Trade Professional?
Architects, designers, and contractors receive exclusive pricing and dedicated project support.
Learn About Trade Pricing →Get Started
Our team can help with product selection, sizing, and specification — at no charge.


